Difference between revisions of "Communicator Wiki(Installer Setup)"
Be g77e8v54 (talk | contribs) (→Extensions) |
Be g77e8v54 (talk | contribs) (→PBXware System Dashboard) |
||
| (6 intermediate revisions by the same user not shown) | |||
| Line 81: | Line 81: | ||
This section displays all UADs/Phones registered to the current slave tenant. In a Multi-Tenant PBXware setup, this menu is only accessible while editing a tenant, as the master tenant handles overall system control and tenant management. | This section displays all UADs/Phones registered to the current slave tenant. In a Multi-Tenant PBXware setup, this menu is only accessible while editing a tenant, as the master tenant handles overall system control and tenant management. | ||
| − | |||
| − | |||
| − | |||
'''Add Extension:''' Click the Add Extension icon to open the extension creation screen. | '''Add Extension:''' Click the Add Extension icon to open the extension creation screen. | ||
| Line 90: | Line 87: | ||
'''CSV Download:''' Export a CSV file containing all existing extensions for the tenant. This file can later be used to import the extensions into another PBXware system. | '''CSV Download:''' Export a CSV file containing all existing extensions for the tenant. This file can later be used to import the extensions into another PBXware system. | ||
| + | |||
| Line 111: | Line 109: | ||
'''Delete:''' Removes the extension from the system | '''Delete:''' Removes the extension from the system | ||
| + | |||
| Line 116: | Line 115: | ||
Adding a new system extension involves two steps. First, you select the UAD (User Agent Device) and define the location of the device—either Local or Remote, Remote is most commonly used. If the desired UAD/Phone is not listed, navigate to Settings > UAD, edit the relevant entry, and set its Status to Active to make it available. In the second step, you'll provide basic user information such as name and email address. When creating an extension within a tenant, note that the username will be prefixed with a tenant code, which is required for the device to register. However, once registered, users can still dial others on the tenant using only their extension numbers. | Adding a new system extension involves two steps. First, you select the UAD (User Agent Device) and define the location of the device—either Local or Remote, Remote is most commonly used. If the desired UAD/Phone is not listed, navigate to Settings > UAD, edit the relevant entry, and set its Status to Active to make it available. In the second step, you'll provide basic user information such as name and email address. When creating an extension within a tenant, note that the username will be prefixed with a tenant code, which is required for the device to register. However, once registered, users can still dial others on the tenant using only their extension numbers. | ||
| + | |||
| + | |||
| Line 125: | Line 126: | ||
The Department field groups the extension within mobile or desktop apps like CommunicatorGO(gloCOM). | The Department field groups the extension within mobile or desktop apps like CommunicatorGO(gloCOM). | ||
| + | |||
| Line 130: | Line 132: | ||
VoIP services usually don't charge per minute for domestic calls, making call rating systems unnecessary. | VoIP services usually don't charge per minute for domestic calls, making call rating systems unnecessary. | ||
| + | |||
Latest revision as of 20:55, 9 April 2025
PBXware System Dashboard [edit]
The PBXware System Dashboard gives a real-time overview of important info, including service status, call stats, licensing, app usage, and hardware performance.
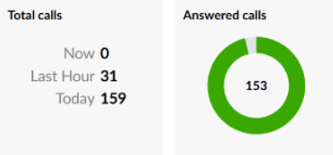
Calls Overview
The Calls Overview shows the number of live calls, calls in the past hour, today's calls, and the percentage of answered calls.
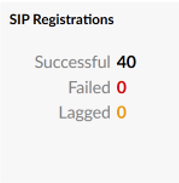
SIP Registrations
SIP Registrations shows the number of successful, failed, and lagged SIP registrations. You can click on any of these values for more details if they're not zero.
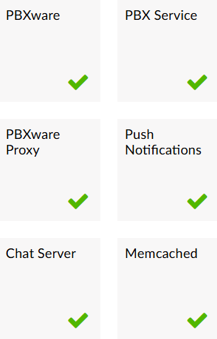
PBXware Services
The PBXware Services section monitors the status of key system services:
PBXware: Main service for web interface access.
PBX Service: Core service for making/receiving calls.
PBXware Proxy: Connects to Asterisk Manager for event handling.
Push Notifications: Wakes up mobile devices for calls.
Chat Server: Manages messaging for desktop and mobile apps.
Memcached: Stores data for PBXware Proxy.
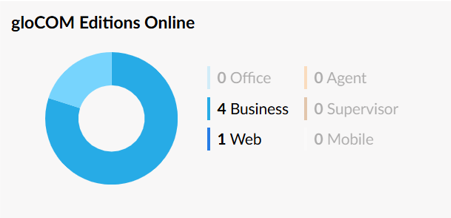
CommunicatorGO(gloCOM) Editions Online
Editions online section displays information on apps registered to PBXware and the editions they use. Note that mobile devices may show inaccurate data because they reduce power consumption by limiting CPU and network activity when apps are in the background. Communicator GO can be disconnected from the server or miss incoming calls when the device enters Doze mode (Android) or suspension (iOS). Doze mode activates after an hour of inactivity on Android, and iOS apps suspend after 10 minutes in the background.
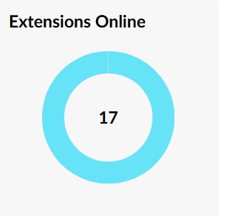
Extensions Online
Extensions online diagram shows the number of online extensions compared to the total number of PBXware extensions.
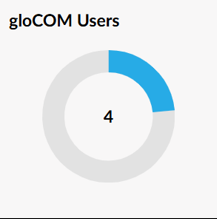
CommunicatorGO(gloCOM) Users
CommunicatorGO(gloCOM) Users diagram shows the number of logged CommunicatorGO(gloCOM) users contrasted to the total number of available licenses.
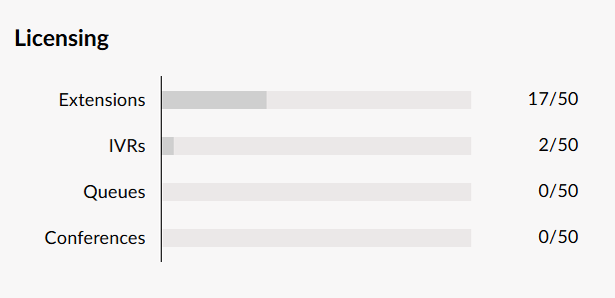
Licensing
Licensing section helps to prevent issues with licensing by showing percentage usage information of your PBXware license for extensions, IVRs, Queues, and conferences
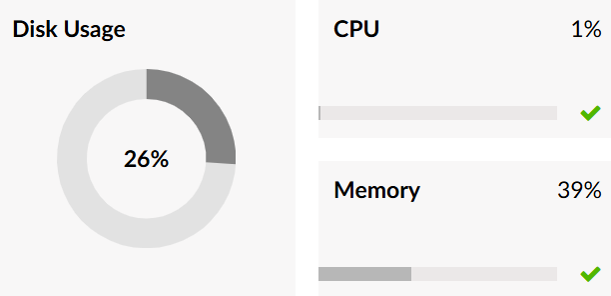
System Hardware Usage
Hardware usage segment shows important information on the current server load, it also helps easily monitor main hardware components such as disk space, CPU, and memory usage.
Disk Usage: Disk usage displays information on current PBXware hard disk usage.
CPU: CPU section shows information on current CPU usage on PBXware server.
Memory: Memory section shows information on current PBXware memory usage.
Extensions[edit]
This section displays all UADs/Phones registered to the current slave tenant. In a Multi-Tenant PBXware setup, this menu is only accessible while editing a tenant, as the master tenant handles overall system control and tenant management.
Add Extension: Click the Add Extension icon to open the extension creation screen.
Search: Use the search bar to find extensions by Name, E-mail, Extension number, or MAC address.
CSV Download: Export a CSV file containing all existing extensions for the tenant. This file can later be used to import the extensions into another PBXware system.
System
This section lists all extensions configured for the selected tenant, displaying key details for each registered UAD/Phone:
Name: Full name of the user assigned to the device
Extension: Extension number linked to the device
User Agent: Device type or model
MAC Address: Unique MAC address of the device
Status: Current status of the device (Active or Inactive)
Protocol: Communication protocol used (SIP)
Edit: Opens the extension’s configuration settings
Delete: Removes the extension from the system
Add/Edit Extension
Adding a new system extension involves two steps. First, you select the UAD (User Agent Device) and define the location of the device—either Local or Remote, Remote is most commonly used. If the desired UAD/Phone is not listed, navigate to Settings > UAD, edit the relevant entry, and set its Status to Active to make it available. In the second step, you'll provide basic user information such as name and email address. When creating an extension within a tenant, note that the username will be prefixed with a tenant code, which is required for the device to register. However, once registered, users can still dial others on the tenant using only their extension numbers.
General
When creating an extension, you can customize several key fields.
The Extension Number is auto-generated but can be changed to any available number (e.g., 112). The Name field sets the user’s full name, which appears as the caller ID on other devices. E-mail is used for sending system notifications like voicemails and PINs, and also serves as a login credential for Online self care(OSC) when paired with the user password.
The Department field groups the extension within mobile or desktop apps like CommunicatorGO(gloCOM).
Call Rating
VoIP services usually don't charge per minute for domestic calls, making call rating systems unnecessary.
Authentication
Username: The default username is the extension number prefixed with the tenant code (e.g., 300112 for extension 112 with tenant code 300). This cannot be changed. Secret: The password used for registration with PBXware, which can be edited.
User Password: The password for CommunicatorGO(gloCOM) registration, automatically populated but can be changed.
Show QR Code: Displays a QR code for easier setup with the CommunicatorGO(gloCOM GO) mobile app, which can be scanned for faster registration. Once registered, users will be prompted to change their password, and the QR code button will be hidden.
Password Requirements: Passwords must meet certain criteria, including length, character types, and special symbols. PBXware provides a password generator to assist in creating strong passwords.
PIN: A Personal Identification Number used for account authorization, accessing voice inbox or services.
Additional Notes: Once an extension is created, the Permissions group can be edited. Always type in values for Name and Email; pasting them will require opening Advanced Options to fix missing details. After creation, the Save & Email button will send extension details to the provided email.
Enhanced Services [edit]
In Enhanced Services, all required fields must be updated from red X's to check marks. The star icon indicates that the customer can modify the setting as needed, while the notepad and pencil icon shows where you can edit the field on the PBXware site. The main fields used by our company are Caller ID and Directory/BLF List. Save the changes as you complete each field.
Caller ID
When editing the Caller ID, it is essential to enter the E-911 number specific to the area. In the Default Caller ID, the business's primary phone number should be entered. Save the changes as you complete each field.
Directory / BLF List
To add programmable buttons, navigate to the Directory/BLF List and click the Plus button. Select whether the button will be a Speed Dial, BLF, or Call Parking. Then, enter the extension number in the Value field, and the Label field should auto-fill accordingly. Save the changes as you complete each field.

